There have been some interesting articles and posts online recently discussing the current global economic situation and the effects of this on the software development industry. Many of these posts and articles outline steps developers can take to raise their value in their current organization or to make themselves more appealing to a potential new employer or client.
As of this writing (Monday night, 12 January 2009), JavaWorld's front page "Editor's Choice" highlights the current economic state of the software development industry with features such as the 2009 Tech Career Planner and a link to the 2009 IT Survival Guide. The 2009 Tech Career Planner states some things that I have observed myself such as the job market in our industry seeming to fare better than others, though it is still under significant strain. It also features links to other interesting articles on improving one's career opportunities.
In IT Salary 2009: Survey Says Modest Declines, James Maguire compares mean salaries for last year for several types of software developers to mean salaries for the current year. The numbers cited there are provided by Janco Associates. Of course, salaries do have some correlation to location and these study results appear to be an aggregate of multiple cities in the United States and Canada. This is more evidence of stagnant salaries in the industry.
A similar article, IT Salaries Take Tiny Leaps, appeared in ComputerWorld in late 2008. This article discusses the constriction of the industry and the effects from that: tightening compensation and lengthier hours.
With the mounting evidence of the impact of a global recession on the software development industry, what is a software developer to do? It turns out, not all that surprisingly, that a software developer should probably do the same things in these troubled times that he or she would (or should) do even in better economic times.
Rob Walling's blog post Eight Ways to Recession-Proof Your Programming Career outlines eight approaches for developers to "recession-proof" their career. The suggestions include items on several similar lists such as presenting at conferences, writing technical articles and blogs, and working longer hours when the work needs justify it. These are things that seem like good ideas for anyone at anytime.
Years ago, when I was between jobs, I took advantage of that time to write my first software development article published by an independent third party. Before that, I had thought about writing an article, but could never seem to find the time, energy, or (most importantly) motivation to do so. However, the satisfaction gained from writing that first article directly led to my interest in writing additional articles and in presenting at different conferences and eventually to writing a blog. Those few weeks between jobs kick-started me into doing something that I love which also benefits my career. I also realized that I could have started being more involved earlier in my career and did not need to wait for an employment crisis.
We are repeatedly reading stories of organizations having a difficult time hiring staff. In the blog posting Hiring During a Recession: Where Have All the Good Candidates Gone?, the blog author postulates that the best developers are staying put with whatever job they currently have rather than interviewing for a new position.
In the thread If the economy is so bad, where are all the qualified applicants?, Grig Larson states that they have applicants who don't even pay full attention during telephone interviews, don't show up to scheduled interviews, and don't seem to care about the interviews when they do show up. Whether in interviews or in daily work activities, most of us do appreciate others showing interest in what they do and in demonstrating basic courtesy and signs of mutual respect.
These firsthand accounts remind one of the importance of being enthusiastic, confident, focused, and polite in interviews. More importantly in the long-term, they remind one to learn new skills and constantly work to improve oneself. In short, we are reminded to do the types of things that benefit ourselves and our employers/clients in good times and in bad times.
The 2009 IT Survival Guide referenced earlier recommends that IT professionals consider certain actions for strengthening their careers. There are links to resources such as The 30 Skills Every IT Person Should Have (some of these don't apply to software development, but some are very applicable), Hot Tech Certifications in a Cool Market (outlines which technical certifications/credentials are most likely worth the cost and effort), and How to Keep Your Tech Career Afloat.
It is safe to say that most of us look forward to a better economic environment and more plentiful opportunities for all. However, when trying to find a silver lining in the current situation, one benefit may be the reminder that there are many things we can do to improve ourselves for the our own benefit and for the benefit of our employers and clients. Most of these actions and behaviors are things that are good ideas at any time, but it sometimes takes times like these to remind us of the value of these activities.
Monday, January 12, 2009


Thursday, January 8, 2009
The Programmer Has No Clothes: A New Blog
I have always appreciated articles and blogs that challenge the groupthink that can so easily pervade our industry. Even if I don't agree with everything stated, I believe that it is good to have my opinions challenged. I don't care for whining or negative comments without any constructive feedback or useful alternatives, but I do like contrarian points of view that are well articulated and challenge truly bad ideas that get easily adopted.
Some examples of these types of articles and blogs that have definitely left an impression on me or otherwise influenced my thinking include 101 EJB Damnations [PDF] (and several other SoftwareReality articles), Why Getter and Setter Methods Are Evil (and Are Getters and Setters Evil?), Why Extends is Evil (and a partial rebuttal Why Extends is Not Evil [PDF]), Hybridizing Java, the book J2EE Design and Development, the book J2EE Without EJB, Five Reasons I Think I Will Not Use Spring, The Problems with JSP, and so forth. While I agree with the sentiments expressed in these articles to differing degrees and even disagree with some of the points in the some of the articles, I found them all to be useful for a little introspection and for either changing the way I thought about something or helping me to realize even more why I liked the approach I was using.
As I stated in my blog posting on Motivations and Explanations for Poor Software Decisions, there have been many cases in the history of our industry where an effect similar to that told in the Emperor's New Clothes occurs. The prevalence of blog postings have helped mitigate this to some degree because more people have been able to point out when a new technology has its significant flaws or is just flat-out poor. However, reactionary and defensive postings are rarely helpful. I prefer the postings that are more thought-out and are based on real-world experience.
With all of the above in mind, I appreciated seeing Jordan Zimmerman's new 2009 blog called The Programmer Has No Clothes. In his first six posts, Zimmerman takes on dependency injection, Maven (and Ant), Test-Driven Development, XML, and code comments. While these have all been praised heavily and criticized (in some cases to a lesser degree), the thing I like about this blog is its focus on exposing things that Zimmerman sees as being similar to the emperor without any real clothes.
I look forward to seeing more posts on this blog dedicated to Zimmerman's stated goal. While it is almost certain that I will not agree with everything stated there, I appreciate a somewhat contrarian point of view. Some of the things Zimmerman discusses (XML and code comments) have been largely criticized and debated (many positive and negative reviews). However, taking on test-driven development and dependency injection seems less common. Whether we agree with each others' opinions or not, I believe it is useful to have our preconceived notions challenged as long as the challenges are experience-based and fact-based rather than driven by emotion and defensiveness.
I find myself torn on many issues. It is useful to see the debates on some of these issues to help me make up my own mind. When opinions are exchanged in a professional and constructive way, we all benefit.
Some examples of these types of articles and blogs that have definitely left an impression on me or otherwise influenced my thinking include 101 EJB Damnations [PDF] (and several other SoftwareReality articles), Why Getter and Setter Methods Are Evil (and Are Getters and Setters Evil?), Why Extends is Evil (and a partial rebuttal Why Extends is Not Evil [PDF]), Hybridizing Java, the book J2EE Design and Development, the book J2EE Without EJB, Five Reasons I Think I Will Not Use Spring, The Problems with JSP, and so forth. While I agree with the sentiments expressed in these articles to differing degrees and even disagree with some of the points in the some of the articles, I found them all to be useful for a little introspection and for either changing the way I thought about something or helping me to realize even more why I liked the approach I was using.
As I stated in my blog posting on Motivations and Explanations for Poor Software Decisions, there have been many cases in the history of our industry where an effect similar to that told in the Emperor's New Clothes occurs. The prevalence of blog postings have helped mitigate this to some degree because more people have been able to point out when a new technology has its significant flaws or is just flat-out poor. However, reactionary and defensive postings are rarely helpful. I prefer the postings that are more thought-out and are based on real-world experience.
With all of the above in mind, I appreciated seeing Jordan Zimmerman's new 2009 blog called The Programmer Has No Clothes. In his first six posts, Zimmerman takes on dependency injection, Maven (and Ant), Test-Driven Development, XML, and code comments. While these have all been praised heavily and criticized (in some cases to a lesser degree), the thing I like about this blog is its focus on exposing things that Zimmerman sees as being similar to the emperor without any real clothes.
I look forward to seeing more posts on this blog dedicated to Zimmerman's stated goal. While it is almost certain that I will not agree with everything stated there, I appreciate a somewhat contrarian point of view. Some of the things Zimmerman discusses (XML and code comments) have been largely criticized and debated (many positive and negative reviews). However, taking on test-driven development and dependency injection seems less common. Whether we agree with each others' opinions or not, I believe it is useful to have our preconceived notions challenged as long as the challenges are experience-based and fact-based rather than driven by emotion and defensiveness.
I find myself torn on many issues. It is useful to see the debates on some of these issues to help me make up my own mind. When opinions are exchanged in a professional and constructive way, we all benefit.
Saturday, January 3, 2009
Easy Java-Based REST Testing Tools
As I've been putting a paper together for my Rocky Mountain Oracle Users Group (RMOUG) Training Days 2009 presentation REST from Web Services Frustrations, I have been wanting a very simple HTTP client and a very simple HTTP server to use to demonstrate both sides of using a REST-based web service. More specifically, I want to demonstrate the various HTTP methods being invoked from both the client perspective and from the server perspective. In this blog posting, I will look quickly at the two Java-based approaches I am currently planning on using for this presentation.
RESTClient (rest-client)
RESTClient is hosted on Google Code as the rest-client project (not to be confused with the Python-based RESTClient project or even with the Google Code-hosted python-rest-client). RESTClient 2.2 is currently available and there is an article called RESTClient 2.1 - Getting Started that provides a nice introduction to RESTClient. A large set of screen snapshots of RESTClient can be found at http://flickr.com/photos/subwiz/tags/restclient/.
I like RESTClient because it is very simple (I was able to start using it quickly and without reading any instructions) and because it is Java Swing-based. The RESTClient download is an executable JAR that is less than 5 MB in size. Once downloaded, it does not need to be uncompressed, but can instead be directly executed with the command (for RESTClient 2.2):
When RESTClient is started as shown above, the Swing-based GUI comes up as shown in the next screen snapshot.

This screen snapshot demonstrates how self-explanatory this tool is to use. One simply enters the URL of interest in the obviously named "URL" field and then selects the HTTP method to be used in the radio buttons underneath the again obviously named "HTTP Methods" header. The bottom of this simple GUI has tabs for looking at headers and at the response body and has a large field for displaying response status information. I will demonstrate some of this functionality toward the end of this blog posting.
The Sun-Provided HTTPServer
The RESTClient product described above, as its name suggests, covers my need for a simple REST client. For a simple REST server, I had thought about using a Java servlet with the appropriate methods corresponding to HTTP methods (doGet(), doPost(), doPut(), doDelete(), doHead(), doOptions(), and doTrace()) overridden for my use. However, I was really looking for the simplest solution that covered my needs and realized that the Sun-provided HTTPServer would work well here.
I have previously blogged about the HTTP Server and adapted the example I provided in that blog posting to a slightly more sophisticated (but still extremely basic) tool to tell me, from a server perspective, what a potential HTTP/REST client has requested. While I may tweak this a bit before the actual conference, I include its current state here. The first class shown,
DustinHttpHandler.java
The Main class that instantiates and uses the HttpHandler described above is called
Main.java
I intentionally have the code print the URL to call to access the HttpServer to make it easier for clients to connect. Note also that a command-line argument can be specified to override the context. This is effectively the resource representation portion in REST parlance.
It is easy to run this application to take advantage of the Sun-provided HttpServer. I built the JAR to be executable as shown in the
MANIFEST.MF of JAR file
With the JAR declared as an executable JAR (
Leveraging the RESTClient with the Sun-Provided HTTP Server
In most cases, I plan to use the RESTClient with "real" REST-based web services and use the HTTP Server approach with "real" clients of REST-based web services. In that way, I have easy approaches to testing pieces of the REST interaction. However, it can still be interesting to use the two together and I intend to do so in my presentation to provide some background on HTTP methods and terminology.
When I run the HTTP Server-based RestServer with a command-line argument of "rest/example/name", it looks like this:
When running the above, I see the following expected output (with your own host of course and with a context different than "rest/example/name" if provided as a command-line argument):
This means the simple HTTP Server is running and I can use CTRL-C to break it when I'm finished.
Running the RESTClient is really easy as discussed above:
I can enter the URL provided by the standard output of the HTTP Server in the URL field of the RESTClient GUI, select an HTTP method with the radio button, and click on the green greater-than signs/arrows pointing right. When using POST method, and changing the tab at the bottom to "Body," the response body is shown as indicated in the following screen snapshot.

If I change the HTTP method to a different method type, the body returned looks the same, but with the different method indicated. The one exception is the HEAD method. As expected, there is no response body shown for the HEAD method because "the HEAD method is identical to GET except that the server MUST NOT return a message-body in the response" (http://www.w3.org/Protocols/rfc2616/rfc2616-sec9.html#sec9.4). The HEAD example is shown in the next screen snapshot.

One can also use a web browser to see the returned body (which is conveniently in HTML thanks to my simple implementation of the HttpHander). By default, the browser uses GET as shown in the following screen snapshot. I also have added an id parameter to the URL for this example to indicate how application state can be passed by the client to the server and how the server in the HTTPServer example can provide an indication of the query parameters received.

Conclusion
There are many tools that can be used in REST development and more are coming all the time. Because I often find myself preferring the simplest tool for the job, it is difficult to beat RESTClient and the HTTP Server that comes with the Sun-provided JVM for simple testing and simple demonstration of REST principles and implementations.
RESTClient (rest-client)
RESTClient is hosted on Google Code as the rest-client project (not to be confused with the Python-based RESTClient project or even with the Google Code-hosted python-rest-client). RESTClient 2.2 is currently available and there is an article called RESTClient 2.1 - Getting Started that provides a nice introduction to RESTClient. A large set of screen snapshots of RESTClient can be found at http://flickr.com/photos/subwiz/tags/restclient/.
I like RESTClient because it is very simple (I was able to start using it quickly and without reading any instructions) and because it is Java Swing-based. The RESTClient download is an executable JAR that is less than 5 MB in size. Once downloaded, it does not need to be uncompressed, but can instead be directly executed with the command (for RESTClient 2.2):
java -jar restclient-2.2-jar-with-dependencies.jar
When RESTClient is started as shown above, the Swing-based GUI comes up as shown in the next screen snapshot.

This screen snapshot demonstrates how self-explanatory this tool is to use. One simply enters the URL of interest in the obviously named "URL" field and then selects the HTTP method to be used in the radio buttons underneath the again obviously named "HTTP Methods" header. The bottom of this simple GUI has tabs for looking at headers and at the response body and has a large field for displaying response status information. I will demonstrate some of this functionality toward the end of this blog posting.
The Sun-Provided HTTPServer
The RESTClient product described above, as its name suggests, covers my need for a simple REST client. For a simple REST server, I had thought about using a Java servlet with the appropriate methods corresponding to HTTP methods (doGet(), doPost(), doPut(), doDelete(), doHead(), doOptions(), and doTrace()) overridden for my use. However, I was really looking for the simplest solution that covered my needs and realized that the Sun-provided HTTPServer would work well here.
I have previously blogged about the HTTP Server and adapted the example I provided in that blog posting to a slightly more sophisticated (but still extremely basic) tool to tell me, from a server perspective, what a potential HTTP/REST client has requested. While I may tweak this a bit before the actual conference, I include its current state here. The first class shown,
DustinHttpHandler, is the class that implements HttpHandler.DustinHttpHandler.java
package dustin.rest;

import com.sun.net.httpserver.Headers;
import com.sun.net.httpserver.HttpExchange;
import com.sun.net.httpserver.HttpHandler;
import java.io.IOException;
import java.io.OutputStream;
import java.net.HttpURLConnection;
import java.util.List;

/**
 * Simple HTTP-receiving server based on the Sun-provided HTTP Server.  Written
 * primarily to be with clients designed for interaction with REST-based
 * web services.  In other words, this simple HTTP Server implementation can be
 * used as a REST-based web services simulator.
 *
 * @author Dustin
 */
public class DustinHttpHandler implements HttpHandler
{
   /**
    * Only method prescribed by the HttpHandler interface.
    *
    * @param httpExchange Encapsulation of HTTP request and response.
    * @throws java.io.IOException
    */
   public void handle(HttpExchange httpExchange) throws IOException
   {
      final String requestMethod = httpExchange.getRequestMethod();
      final String response = buildResponse(httpExchange);
      System.out.println("*** HTTP Request Method: " + requestMethod + "***");
      httpExchange.sendResponseHeaders(HttpURLConnection.HTTP_OK, response.length());
      final OutputStream os = httpExchange.getResponseBody();
      os.write(response.getBytes());
      os.close();
   }

   /**
    * Build up the response String.
    *
    * @param httpExchange HTTP method associated with request.
    * @return Response String.
    */
   private String buildResponse(final HttpExchange httpExchange)
   {
      final StringBuffer buffer = new StringBuffer();
      buffer.append("<html><head><title>Dustin's Simple Example</title></head>");
      buffer.append("<body><table border='1'>");
      appendHtmlTableRow(buffer, httpExchange.getRequestMethod(), "HTTP Method");
      appendHtmlTableRow(buffer, httpExchange.getProtocol(), "Protocol");
      appendApplicationState(buffer, httpExchange, "Application State");
      appendRequestHeadersPortion(buffer, httpExchange.getRequestHeaders());
      buffer.append("</table></body></html>");
      return buffer.toString();
   }

   /**
    * Append the application state (query parameters provided in the URL provided
    * by the client) to the provided StringBuffer.
    *
    * @param buffer StringBuffer to which to append the client-provided
    *    application state.
    * @param httpExchange Provides the handle to the client-provided state.
    * @param label Label for the HTML table.
    */
   private void appendApplicationState(
      final StringBuffer buffer,
      final HttpExchange httpExchange,
      final String label)
   {
      appendHtmlTableRow(buffer, httpExchange.getRequestURI().getQuery(), label);
   }

   /**
    * Append provided headers to the provided buffer.
    *
    * @param buffer Buffer to which headers information will be appended.
    * @param headers Headers whose information needs to be appended to buffer.
    */
   private void appendRequestHeadersPortion(
      final StringBuffer buffer, final Headers headers)
   {
      appendHtmlTableWithHeaders(buffer, "Request Headers", headers);
   }

   /**
    * Append provided HTTP response headers to provided StringBuffer.
    *
    * @param buffer Buffer to which to append the response headers information.
    * @param headers Response headers to be appended to StringBuffer.
    */
   private void appendResponseHeadersPortion(
      final StringBuffer buffer, final Headers headers)
   {
      appendHtmlTableWithHeaders(buffer, "Response Headers", headers);
   }

   /**
    * Append an HTML table row with potentially multiple headers.
    *
    * @param buffer Buffer to which to append the new HTML table row.
    * @param headerLabel The highlighted label for the left column.
    * @param headers The headers to be appended to the provided buffer.
    */
   private void appendHtmlTableWithHeaders(
      final StringBuffer buffer,
      final String headerLabel,
      final Headers headers)
   {
      appendSingleHeaderRow(buffer, headerLabel);
      for (final Headers.Entry<String,List<String>> header : headers.entrySet())
      {
         appendHtmlTableRowMultipleValues(buffer, header.getValue(), header.getKey());
      }
   }

   /**
    * Build a two-column row for an HTML table with the elementString value
    * being placed in the right column and the elementLabel being placed in
    * the left column with heading emphasis.
    *
    * @param bufferToAppend Buffer to which to append HTML table row.
    * @param elementString Normal table data element (right column) value.
    * @param elementLabel Highlighted table header element (left column) value.
    */
   private void appendHtmlTableRow(
      final StringBuffer bufferToAppend,
      final String elementString,
      final String elementLabel)
   {
      bufferToAppend.append(
         "<tr><th>" + elementLabel + "</th><td>" + elementString + "</td></tr>");
   }

   /**
    * Append to buffer with an HTML table row that has potentially multiple
    * values for a single value column (multiple values per header column).
    *
    * @param bufferToAppend Buffer to which to append HTML table row.
    * @param elementStrings Multiple values to be appended in single values column.
    * @param elementLabel Header label for left column of row.
    */
   private void appendHtmlTableRowMultipleValues(
      final StringBuffer bufferToAppend,
      final List<String> elementStrings,
      final String elementLabel)
   {
      bufferToAppend.append("<tr><th>" + elementLabel + "</th><td>");
      for (final String value : elementStrings)
      {
         bufferToAppend.append(value + "\n");
      }
      bufferToAppend.append("</td></tr>");
   }

   /**
    * Append a single-cell row for HTML table section headers.
    *
    * @param bufferToAppend Buffer to which to append the single-cell header row.
    * @param value String to place in the single-cell header row; the section
    *    title.
    */
   private void appendSingleHeaderRow(
      final StringBuffer bufferToAppend,
      final String value)
   {
      bufferToAppend.append("<tr><th colspan='2'>");
      bufferToAppend.append(value);
      bufferToAppend.append("</th></tr>");
   }
}
The Main class that instantiates and uses the HttpHandler described above is called
Main and its code listing is shown next:Main.java
package dustin.rest;

import com.sun.net.httpserver.HttpServer;
import java.io.IOException;
import java.net.InetAddress;
import java.net.InetSocketAddress;

/**
 * Simple executable to start HttpServer for HTTP request/response interaction.
 *
 * Run this class with a command line this:
 *      java -cp RESTfulJava.jar dustin.rest.Main
 *
 * The URL for connecting to this HTTPServer instance from a client will be
 *      http://localhost:8000/dustin
 */
public class Main
{
   public static final int PORT = 8000;
   public static final int BACKLOG = 0;   // none
   public static final String DEFAULT_URL_CONTEXT = "/dustin";

   /**
    * Main executable to run Sun's built-in JVM HTTP server.
    *
    * @param arguments The command line arguments; single argument for URL
    *    context expected.
    */
   public static void main(final String[] arguments) throws IOException
   {
      final String hostName = InetAddress.getLocalHost().getCanonicalHostName();
      final String urlContext = obtainUrlContext(arguments);
      final HttpServer server =
         HttpServer.create(new InetSocketAddress(PORT), BACKLOG);
      server.createContext(urlContext, new DustinHttpHandler());
      server.setExecutor(null); // allow default executor to be created
      System.out.println("\n\nSimple HTTP Server is running.  Use URL\n");
      System.out.println("    http://" + hostName + ":" + PORT + urlContext);
      System.out.println("\nto access this server.");
      server.start();
   }

   /**
    * Extract the URL Context from the command-line or use a default if no
    * argument was provided on the command-line.
    *
    * @param commandLineArguments Command-line arguments.
    * @return URL context.
    */
   private static String obtainUrlContext(final String[] commandLineArguments)
   {
      String urlContext = DEFAULT_URL_CONTEXT;
      final int numCmdLineArgs = commandLineArguments.length;
      if (numCmdLineArgs > 0)
      {
         final String cmdProvidedContext = commandLineArguments[0];
         urlContext = (cmdProvidedContext.startsWith("/"))
                     ? cmdProvidedContext
                     : "/" + cmdProvidedContext;
      }
      return urlContext;
   }
}
I intentionally have the code print the URL to call to access the HttpServer to make it easier for clients to connect. Note also that a command-line argument can be specified to override the context. This is effectively the resource representation portion in REST parlance.
It is easy to run this application to take advantage of the Sun-provided HttpServer. I built the JAR to be executable as shown in the
Main-Class entry in the META-INF/MANIFEST.MF file shown below:MANIFEST.MF of JAR file
Manifest-Version: 1.0
Ant-Version: Apache Ant 1.7.0
Created-By: 11.0-b15 (Sun Microsystems Inc.)
Main-Class: dustin.rest.Main
With the JAR declared as an executable JAR (
RestServer.jar), it is simple to run the application:
java -jar RestServer.jar
Leveraging the RESTClient with the Sun-Provided HTTP Server
In most cases, I plan to use the RESTClient with "real" REST-based web services and use the HTTP Server approach with "real" clients of REST-based web services. In that way, I have easy approaches to testing pieces of the REST interaction. However, it can still be interesting to use the two together and I intend to do so in my presentation to provide some background on HTTP methods and terminology.
When I run the HTTP Server-based RestServer with a command-line argument of "rest/example/name", it looks like this:
java -jar RestServer.jar rest/example/name
When running the above, I see the following expected output (with your own host of course and with a context different than "rest/example/name" if provided as a command-line argument):
Simple HTTP Server is running.  Use URL

      http://gandalf.marx.net:8000/rest/example/name

to access this server.
This means the simple HTTP Server is running and I can use CTRL-C to break it when I'm finished.
Running the RESTClient is really easy as discussed above:
java -jar restclient-2.2-jar-with-dependencies.jar
I can enter the URL provided by the standard output of the HTTP Server in the URL field of the RESTClient GUI, select an HTTP method with the radio button, and click on the green greater-than signs/arrows pointing right. When using POST method, and changing the tab at the bottom to "Body," the response body is shown as indicated in the following screen snapshot.

If I change the HTTP method to a different method type, the body returned looks the same, but with the different method indicated. The one exception is the HEAD method. As expected, there is no response body shown for the HEAD method because "the HEAD method is identical to GET except that the server MUST NOT return a message-body in the response" (http://www.w3.org/Protocols/rfc2616/rfc2616-sec9.html#sec9.4). The HEAD example is shown in the next screen snapshot.

One can also use a web browser to see the returned body (which is conveniently in HTML thanks to my simple implementation of the HttpHander). By default, the browser uses GET as shown in the following screen snapshot. I also have added an id parameter to the URL for this example to indicate how application state can be passed by the client to the server and how the server in the HTTPServer example can provide an indication of the query parameters received.

Conclusion
There are many tools that can be used in REST development and more are coming all the time. Because I often find myself preferring the simplest tool for the job, it is difficult to beat RESTClient and the HTTP Server that comes with the Sun-provided JVM for simple testing and simple demonstration of REST principles and implementations.
Thursday, January 1, 2009
Bare Bones BlazeDS Object Remoting
In this blog posting, I will demonstrate using BlazeDS for object remoting between a Flex client and a Java EE-based server. There are several good blog postings and articles on BlazeDS remoting out there already (see Additional Resources section below), but most of them either don't provide a complete example or apply FlexBuilder for some of the "magic." In this post, I will not use FlexBuilder and any IDE or text editor can be used. This allows one to see all the underlying details directly.
Tools Used in these Examples
For the examples in this blog posting, I will be using the following tools:
The following screen snapshot demonstrates the versions of these tools used as described above.

Setting Up BlazeDS for the Application
I won't go into any greater detail regarding installation of the Flex SDK, of the Java SDK, of a Java EE-compliant web server, of Ant, or of an IDE or text editor than that provided above. However, I will briefly look a little closer at installation of BlazeDS.
BlazeDS is open source and its source can be downloaded here, but the source code for BlazeDS is not needed for any of the examples in this blog posting.
The BlazeDS download page includes release builds and nightly builds. I am using a release build for the examples here. BlazeDS 3.2 Release Build 3978 is available as of this writing and I am using BlazeDS 3.2 Release Build 3978 for these examples.
An advantage of using the Turnkey download is that Tomcat web server is included with it. However, I intentionally want the examples in this posting to be "bare bones" and so will use a separate JEE implementation. With the non-Turnkey binary BlazeDS release downloaded (it will be called something like

With access to the
The next screen snapshot shows the contents of the

For my examples, I will be expanding the


As the immediately preceding image shows, the expanded
Tailoring BlazeDS Web Descriptor Configuration for Custom Application
Up until now, we've merely unzipped the downloaded binary BlazeDS file and then expanded the
One of the first things I like to do when customizing my own BlazeDS-based application based on the provided
The less important changes that I make to the provided

The new and customized
New and Customized web.xml File
Customizing Other BlazeDS Configuration Files
Besides the
The first file we'll look at is called
I use the same approach with
templates/services-config-template.xml
The code for the template version of
I left the reference in
remoting-config.xml
The above
Whew! That wraps up the BlazeDS configuration modifications. If you have not looked into this before, it looks worse than it really is. Most of the final content shown in the code listings above was already provided by the
The Java Class
The contents of the
HelloWorldRemotingServer.java (1st Version)
The important thing to note from the code listing for the Java class immediately above is that it is a regular Java class with no knowledge of Flex or ActionScript.
The Flex Client (Hello World Client)
The Java class we just looked at returns a provided String surrounded with a Hello World prefix and exclamation point. We'll now look at the Flex MXML code that can be used to invoke this Java object and this
HelloWorldRemotingClient.mxml
The MXML code above is very simple. The RemoteObject element (with an 'id' of "remoteObject") specifies a destination (via the 'destination' attribute) of "HelloWorld" (defined above in the
If you plan to use the
Building it All
Even though I still need to show another Flex client, an ActionScript class, and another Java class whose instantiation is bound to the ActionScript class's instantiation, I am including the entire Ant
build.xml (Ant)
In the above
Targets of specific interest in the above
When I build the WAR and the client SWF file (same name as its source MXML file but with an .swf extension rather than the .mxml extension), I can then deploy the WAR and run the SWF client. The deployment of the WAR file is done with whatever mechanism your web serve provides. The SWF client can easily be executed by clicking on it or typing its full name on the command line. The following two screen snapshots show the client running by first showing how it initially appears and then showing how it appears once a name has been entered into the name field.


Binding Java to ActionScript
The above example demonstrates the ability to remotely call Java on the server from MXML on the client via the RemoteObject and BlazeDS. However, the example up to this point has only used simple mappings (in this case Strings). It is more interesting to now move onto an example of binding a more complex objects. The good news is that it is all still pretty easy.
For this slightly more complex example, we will expand the
HelloWorldRemotingServer.java (Finished Version)
One of the newly added methods is called
Person.java
There is nothing remarkable about the
For Strings, primitives, and object/boxed versions of primitives, BlazeDS can typically map these types to appropriate ActionScript types. Now that we've introduced the
Person.as
Arguably the most interesting point about the ActionScript version of
The ActionScript
I want to make one final observation regarding the
A New Flex Client (Complex Object Client)
The code for
ComplexObjectRemotingClient.mxml
The new Flex client uses a little ActionScript to prepare the call to the server and instantiates one of our newly written
The following two screen snapshots show the initial and final state of the new client when it is executed as the Hello World client was earlier.
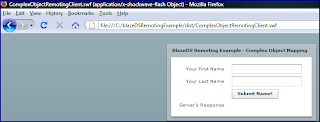

As the above output shows, the method accepting a Person object (note the exclamation point in the returned message) has been contacted on the Java side from a remote Flex client.
Pictorial Overview of Directory/File Structure
One of the things that can be a little tricky about using BlazeDS or the mxmlc compiler if you have very little experience using them is the placement of files. Fortunately, most of this was already setup correctly by the

The image above shows where to place MXML source files, ActionScript source files, and Java source files for the
Conclusion
This has turned out to be a rather lengthy blog entry. However, this is to be expected considering that I've intentionally tried to make this a complete and thorough introduction to BlazeDS/Java remoting and because I have included the code directly within the blog posting rather than as a separate attachment. Also, I've tried to avoid use of anything specific to FlexBuilder so that anyone with any text editor should be able to use my examples.
Despite the length of this blog entry, use of the BlazeDS remoting is pretty straightforward once you have tried it a couple times. It does get more complex when security constraints and other details are added back in, but one can choose how much one implements at each step and the examples above are nice for confirming that client-to-server communication is working properly.
Additional Resources
Tools Used in these Examples
For the examples in this blog posting, I will be using the following tools:
- BlazeDS - I am using BlazeDS 3.2 and I am using the binary distribution (not Turnkey that includes Tomcat) to be more "bare bones."
- Flex 3 SDK - I am using Flex 3.2. For convenience, I have set an environment variable
FLEX_HOMEto point to the main directory of my Flex 3 installation (where I unzipped it) and I have included%FLEX_HOME%\bin (or$FLEX_HOME/bin) on myPATH. - Java SE SDK - I am using Java SE 6 Update 10, but a newer or older version of Java SE should be fine as long as you are using at least J2SE 5.
- Java EE web implementation - The BlazeDS Turnkey includes Tomcat, but I am using GlassFish for my examples. In theory, it should not matter which Java EE-compliant web server you use.
- Ant (optional) - I provide a
build.xmlAnt build file in this posting that will build the Flex clients and will build the BlazeDS/JEE-powered server. However, these operations can be done individually as well. While I build a WAR file with my Ant build for the server-side deployment, one could simply edit directories and files in one's favorite server's deployment directory for the same effect. Similarly, one could build the Flex clients individually on the command line with the mxmlc command rather than using thebuild.xmlfile to do this. I am using Ant 1.7, but I am not aware of any features I am using specific to that version. Finally, I have myANT_HOMEenvironment variable set to my installation of Ant and have%ANT_HOME%/binin my path for convenience in building. - Text Editor or IDE - You could use FlexBuilder, but do not need to for the examples in this posting. Other choices include NetBeans, Eclipse, JDeveloper, IDEA, JEdit, SpketIDE, vim, emacs, and even Notepad/Wordpad. If you do choose to use an IDE that supports XML, you can make things a little easier for yourself by associating MXML with XML as I demonstrate with NetBeans here and with JEdit here. Also, there are plug-ins for Flex for IDEs such as FlexBean for NetBeans. Also, it is my understanding that IDEA has built-in Flex support.
The following screen snapshot demonstrates the versions of these tools used as described above.

Setting Up BlazeDS for the Application
I won't go into any greater detail regarding installation of the Flex SDK, of the Java SDK, of a Java EE-compliant web server, of Ant, or of an IDE or text editor than that provided above. However, I will briefly look a little closer at installation of BlazeDS.
BlazeDS is open source and its source can be downloaded here, but the source code for BlazeDS is not needed for any of the examples in this blog posting.
The BlazeDS download page includes release builds and nightly builds. I am using a release build for the examples here. BlazeDS 3.2 Release Build 3978 is available as of this writing and I am using BlazeDS 3.2 Release Build 3978 for these examples.
An advantage of using the Turnkey download is that Tomcat web server is included with it. However, I intentionally want the examples in this posting to be "bare bones" and so will use a separate JEE implementation. With the non-Turnkey binary BlazeDS release downloaded (it will be called something like
blazeds-bin-3.2.0.3978.zip), "installation" simply involves unzipping the ZIP file and extracting the WAR file (blazeds.war) from it. The next screen snapshot shows the contents of this binary BlazeDS download, including the WAR file just mentioned.
With access to the
blazeds.war file, we now need to expand the blazeds.war's contents. We have two choices here. One popular choice is to expand this WAR file's contents in a web server's deployment directory. Many web servers will then automatically deploy the contents of that expanded directory. However, I will be taking the second approach here and will rebuild the WAR file for deployment with an Ant script. This provides greater portability between web servers and allows me to show better what needs to be included in the server-side BlazeDS-powered WAR file via the build.xml file. You should be able to use the direct deployment of expanded directory approach and not need Ant for the server-side if you prefer that approach.The next screen snapshot shows the contents of the
blazeds.war file that needs to be expanded.
For my examples, I will be expanding the
blazeds.war file's contents into the C:\blazeDSRemotingExample) directory. I typically remove the META-INF directory and its contents from the expanded directory, so that it looks something like that shown in the next two screen snapshots. Note that the red lines through directories in the first screen snapshot are intentional because the entries that they cross out will eventually be built up, but will not be there when blazeds.war is initially expanded (in other words, your newly expanded directory should only have the WEB-INF directory if you deleted the META-INF directory as I did).

As the immediately preceding image shows, the expanded
blazeds.war contents include some expected subdirectories beneath WEB-INF including classes and lib. Because we will rebuild our server's WAR file with this same expanded directory structure, we already have the necessary directories we need for the web application's classpath.Tailoring BlazeDS Web Descriptor Configuration for Custom Application
Up until now, we've merely unzipped the downloaded binary BlazeDS file and then expanded the
blazeds.war file into a directory. Now it is time to begin tweaking the configuration files included with the blazeds.war file to accommodate our application.One of the first things I like to do when customizing my own BlazeDS-based application based on the provided
blazeds.war file is to upgrade the web application descriptor file (web.xml) to reflect Servlet 2.5 rather than Servlet 2.3. I provide more detail on this process in my blog entry on OpenLaszlo with Java Servlets 2.5 (OpenLaszlo also provides an older web.xml file). The most important changes to note are that the DTD-described file becomes W3C XML Schema described instead, the version attribute is obviously updated from 2.3 to 2.5, and the <display-name> element is removed as a nested element under the <servlet> element. This particular change of versions of the web.xml file is probably not absolutely necessary in this case because I'm not using Java EE 5 annotations, but I make the change every time anyway.The less important changes that I make to the provided
web.xml file include removal of commented out section specifically intended for WebSphere (which I'm not using here) and other comments. The other change I make is to change the text for the high-level <display-name> and <description> elements. Indeed, when I have completed the transformation, the new web.xml file still looks very similar to the one provided with the blazeds.war file. Several of these changes are depicted in the next screen snapshot taken of a diff run against the two versions of web.xml using the ExamDiff tool.
The new and customized
web.xml file is shown next.New and Customized web.xml File
<?xml version="1.0" encoding="UTF-8"?>
<web-app xmlns:xsi="http://www.w3.org/2001/XMLSchema-instance"
         xsi:schemaLocation="http://java.sun.com/xml/ns/javaee http://java.sun.com/xml/ns/javaee/web-app_2_5.xsd"
         version="2.5" xmlns="http://java.sun.com/xml/ns/javaee">
    <display-name>Dustin's BlazeDS Hello World Example</display-name>
    <description>An extremely simple BlazeDS Remoting Application</description>

    <!-- Http Flex Session attribute and binding listener support -->
    <listener>
        <listener-class>flex.messaging.HttpFlexSession</listener-class>
    </listener>

    <!-- MessageBroker Servlet -->
    <servlet>
        <servlet-name>MessageBrokerServlet</servlet-name>
        <servlet-class>flex.messaging.MessageBrokerServlet</servlet-class>
        <init-param>
            <param-name>services.configuration.file</param-name>
            <param-value>/WEB-INF/flex/services-config.xml</param-value>
       </init-param>
        <load-on-startup>1</load-on-startup>
    </servlet>

    <servlet-mapping>
        <servlet-name>MessageBrokerServlet</servlet-name>
        <url-pattern>/messagebroker/*</url-pattern>
    </servlet-mapping>

    <welcome-file-list>
        <welcome-file>index.html</welcome-file>
        <welcome-file>index.htm</welcome-file>
    </welcome-file-list>

</web-app>
Customizing Other BlazeDS Configuration Files
Besides the
classes and lib subdirectories contained under WEB-INF in the directory expanded from the blazeds.war file, we also have subdirectories called src and flex. We will not customize a couple XML files inside the flex directory to tailor BlazeDS for our application's use.The first file we'll look at is called
services-config.xml. This file is central to all BlazeDS-based applications whether they are based on RPC or messaging. In fact, among other things, this file usually imports additional configuration files for things that are specific to proxying, to remoting, and to messaging.I use the same approach with
services-config.xml that I used with web.xml: I adapt the version provided by blazeds.war to work for the custom application. However, there is a twist in this one case. I want to have a slightly different version of this file for my Flex client than I have for my WAR that gets deployed on the server. Keeping the DRY principle in mind, my approach here is to create a services-config-template.xml file and use Ant's text substitution functionality to automatically generate the services-config.xml file to be used by both the Flex client and by the WAR that is deployed to the server. The next code listing shows the template file, which I placed in a newly created directory creatively called "templates".templates/services-config-template.xml
<?xml version="1.0" encoding="UTF-8"?>
<services-config>

    <services>
        <service-include file-path="remoting-config.xml" />
        <service-include file-path="proxy-config.xml" />
        <service-include file-path="messaging-config.xml" />
    </services>

    <security>
        <login-command class="flex.messaging.security.TomcatLoginCommand" server="Tomcat"/>
    </security>

    <channels>
        <channel-definition id="my-amf" class="mx.messaging.channels.AMFChannel">
            <endpoint url="http://@host@:@port@/{context.root}/messagebroker/amf"
                      class="flex.messaging.endpoints.AMFEndpoint"/>
        </channel-definition>
        <channel-definition id="my-secure-amf" class="mx.messaging.channels.SecureAMFChannel">
            <endpoint url="https://@host@:@port@/{context.root}/messagebroker/amfsecure"
                      class="flex.messaging.endpoints.SecureAMFEndpoint"/>
            <properties>
                <add-no-cache-headers>false</add-no-cache-headers>
            </properties>
        </channel-definition>

        <channel-definition id="my-polling-amf" class="mx.messaging.channels.AMFChannel">
            <endpoint url="http://@host@:@port@/{context.root}/messagebroker/amfpolling" class="flex.messaging.endpoints.AMFEndpoint"/>
            <properties>
                <polling-enabled>true</polling-enabled>
                <polling-interval-seconds>4</polling-interval-seconds>
            </properties>
        </channel-definition>
    </channels>

    <logging>
        <target class="flex.messaging.log.ConsoleTarget" level="Error">
            <properties>
                <prefix>[BlazeDS] </prefix>
                <includeDate>false</includeDate>
                <includeTime>false</includeTime>
                <includeLevel>false</includeLevel>
                <includeCategory>false</includeCategory>
            </properties>
            <filters>
                <pattern>Endpoint.*</pattern>
                <pattern>Service.*</pattern>
                <pattern>Configuration</pattern>
            </filters>
        </target>
    </logging>

    <system>
        <redeploy>
            <enabled>false</enabled>
        </redeploy>
    </system>

</services-config>
The code for the template version of
services-config-template.xml shown immediately above includes Ant token markers (@host@ and @port@) that will be replaced by Ant with an actual host name and a port number for the client's version of services-config.xml). These same tokens will be replaced with BlazeDS-recognized tokens {server.name} and {server.port} for the server-side version of services-config.xml. Note that I was able to leave the BlazeDS template {context.root} in the template for the client-side version of services-config.xml because the mxmlc compiler allows me to specify its value for the client as an option.I left the reference in
services-config.xml to all three previously referenced files (remoting-config.xml, proxy-config.xml, and messaging-config.xml), but really only need the reference to remoting-config.xml for this blog post examples. As with the web.xml file, my approach to creation of that referenced remoting-config.xml file is to simply adapt the one provided with the expanded blazeds.war file. The only necessary change is to specify the Java classes that will be used on the server side. We haven't looked at this Java class yet, but the remoting-config.xml file shown in the next code listing tips us off that it will be a class named HelloWorldRemotingServer in a package named dustin.remoting-config.xml
<?xml version="1.0" encoding="UTF-8"?>
<service id="remoting-service"
         class="flex.messaging.services.RemotingService">

    <adapters>
        <adapter-definition id="java-object" class="flex.messaging.services.remoting.adapters.JavaAdapter" default="true"/>
    </adapters>

    <default-channels>
        <channel ref="my-amf"/>
    </default-channels>

   <destination id="HelloWorld">
      <properties>
         <source>dustin.HelloWorldRemotingServer</source>
      </properties>
   </destination>
</service>
The above
remoting-config.xml file specifies that the destination associated with this Java class on the server side can be referenced as "HelloWorld" (the 'id' attribute of the destination element).Whew! That wraps up the BlazeDS configuration modifications. If you have not looked into this before, it looks worse than it really is. Most of the final content shown in the code listings above was already provided by the
blazeds.war that we expanded. I only made some relatively small modifications to the web.xml and remoting-config.xml files. The services-config.xml file likewise only required some minor changes, but the more significant issue there was that I needed to prepare a different version of this file for the client than for the server. The server version of services-config.xml can resolve the BlazeDS tokens {host.name} and {host.port} based on the web server settings, but I specify a hard-coded host name and port for the client version of services-config.xml.The Java Class
The contents of the
remoting-config.xml file provided us with a sneak peek at some details about the Java class on the server. The definition of this simple Java class is shown next. Note that this file is placed in a subdirectory called dustin (because it is in the "dustin" Java package) under the src subdirectory under WEB-INF in our expanded directory.HelloWorldRemotingServer.java (1st Version)
package dustin;

/**
 * Simple "Hello World" example meant for use in BlazeDS remoting example.
 * This is the server-side POJO that will be exposed to a Flex client via
 * BlazeDS remoting.
 *
 * @author Dustin
 */
public class HelloWorldRemotingServer
{
   /** No-arguments constructor. */
   public HelloWorldRemotingServer() {}

   /**
    * Accept a String representing a name and return that name as part of a
    * Hello message.
    *
    * @param nameToSayHelloTo Name to which Hello will be addressed.
    * @return Hello address to provided name.
    */
   public String processHello(final String nameToSayHelloTo)
   {
      return "Hello, " + nameToSayHelloTo + "!";
   }
}
The important thing to note from the code listing for the Java class immediately above is that it is a regular Java class with no knowledge of Flex or ActionScript.
The Flex Client (Hello World Client)
The Java class we just looked at returns a provided String surrounded with a Hello World prefix and exclamation point. We'll now look at the Flex MXML code that can be used to invoke this Java object and this
processHello(String) method via BlazeDS.HelloWorldRemotingClient.mxml
<?xml version="1.0" encoding="UTF-8" ?>
<mx:Application xmlns:mx="http://www.adobe.com/2006/mxml"
                width="1100" height="700">

   <!-- Associate client with BlazeDS destination via RemoteObject. -->
   <mx:RemoteObject id="remoteObject" destination="HelloWorld" />

   <mx:Panel id="mainPanel" title="Simple BlazeDS Remoting Example - Hello World">
      <mx:Form>
         <mx:FormItem label="Provide Your Name">
            <mx:TextInput id="textInput"
                          change="remoteObject.processHello(textInput.text)"/>
         </mx:FormItem>
         <mx:FormItem label="Server's Response">
            <mx:Label text="{remoteObject.processHello.lastResult}"/>
         </mx:FormItem>
      </mx:Form>
   </mx:Panel>
</mx:Application>
The MXML code above is very simple. The RemoteObject element (with an 'id' of "remoteObject") specifies a destination (via the 'destination' attribute) of "HelloWorld" (defined above in the
remoting-config.xml file).If you plan to use the
build.xml file provided in this blog posting, this MXML file should be placed at parallel to the WEB-INF directory (as opposed to in the WEB-INF directory like the Java class and configuration files previously discussed).Building it All
Even though I still need to show another Flex client, an ActionScript class, and another Java class whose instantiation is bound to the ActionScript class's instantiation, I am including the entire Ant
build.xml file here for convenience. Some of the targets defined in this file will not work until the remaining classes discussed later in this blog posting are included.build.xml (Ant)
<?xml version="1.0" encoding="UTF-8"?>
<project name="HelloWorldBlazeDSRemotingExample" default="all" basedir=".">
   <description>Builds, tests, and runs the Dustin's Hello World BlazeDS Remoting Example.</description>

   <!-- NOTE TO USERS: At least three properties set below may need to be
                       set for this build file to work with different deployment
                       environments.  The three minimum properties to examine
                       are client.host, client.port, and app.dir.
   -->

   <!-- GENERAL PROPERTIES -->
   <!--
        *********************************************************************
        Change server's host name and port (determined by web server
        deployment of server side of code).
        *********************************************************************
   -->
   <property name="client.host" value="localhost" />
   <property name="client.port" value="8080" />
   <!--
        *********************************************************************
        Change definition of app.dir if necessary (to where blazeds.war
               has been uncompressed).
        *********************************************************************
   -->
   <property name="app.dir" value="C:\\blazeDSRemotingExample" />
   <property name="web.inf.dir" value="${app.dir}/WEB-INF" />
   <property name="templates.dir" value="${app.dir}/templates" />
   <property name="context.name" value="HelloWorldRemotingServer" />


   <!-- GENERAL JAVA PORTION PROPERTIES -->
   <property name="src.dir" value="${web.inf.dir}/src" />
   <property name="classes.dir" value="${web.inf.dir}/classes" />
   <property name="lib.dir" value="lib" />
   <property name="dist.dir" value="${app.dir}/dist" />
   <property name="javadoc.dir" value="${dist.dir}/javadoc" />
   <property name="serverside.war" value="${context.name}.war" />

   <!-- Nothing special needed for classpath! -->
   <path id="classpath" />


   <!-- BLAZEDS RELATED PROPERTIES -->
   <property name="services.config.server.name"
             value="services-config.xml" />
   <property name="services.config.client.name"
             value="services-config-client.xml" />
   <property name="services.config.template"
             value="services-config-template.xml" />


   <!-- GENERAL FLEX PORTION PROPERTIES (FLEX CLIENT) -->
   <property name="app.flex.dir" value="${web.inf.dir}/flex" />
   <property name="flex.debug" value="true" />
   <property name="flex.warnings" value="true" />
   <property name="flex.context.root" value="${context.name}" />
   <property name="flex.services"
             value="${app.flex.dir}/${services.config.client.name}" />
   <property name="flex.source.path" value="${web.inf.dir}" />
   <property name="flex.publisher" value="Dustin" />
   <property name="flex.title"
             value="'Hello World BlazeDS Remoting Example'" />
   <property name="flex.description"
             value="'Simple client for BlazeDS Remoting example'" />
   <property name="flex.verbose.stacktraces" value="true" />
   <property name="flex.actionscript.warnings" value="true" />
   <property name="flex.app.helloworld.name.root"
             value="HelloWorldRemotingClient" />
   <property name="flex.app.helloworld.name.source"
             value="${flex.app.helloworld.name.root}.mxml" />
   <property name="flex.app.helloworld.name.swf"
             value="${flex.app.helloworld.name.root}.swf" />
   <property name="flex.app.complexobject.name.root"
             value="ComplexObjectRemotingClient" />
   <property name="flex.app.complexobject.name.source"
             value="${flex.app.complexobject.name.root}.mxml" />
   <property name="flex.app.complexobject.name.swf"
             value="${flex.app.complexobject.name.root}.swf" />


   <target name="-init">
      <mkdir dir="${dist.dir}" />
      <mkdir dir="${javadoc.dir}" />
   </target>

   <target name="-copy-respective-services-config-files"
           depends="-clean-generated-blazeds-config-files">
      <copy file="${templates.dir}/${services.config.template}"
            tofile="${app.flex.dir}/${services.config.server.name}" >
         <filterchain>
            <replacetokens>
               <token key="host" value="{server.name}"/>
               <token key="port" value="{server.port}"/>
            </replacetokens>
         </filterchain>
      </copy>
      <copy file="${templates.dir}/${services.config.template}"
            tofile="${app.flex.dir}/${services.config.client.name}" >
         <filterchain>
            <replacetokens>
               <token key="host" value="${client.host}"/>
               <token key="port" value="${client.port}"/>
            </replacetokens>
         </filterchain>
      </copy>
   </target>

   <target name="compile"
           depends="compileJavaBasedServer, compileFlexBasedClients"
           description="Compile Java and Flex code." />

   <target name="compileJavaBasedServer"
           description="Compile Java source code used for server side.">
      <javac srcdir="${src.dir}"
             destdir="${classes.dir}"
             classpathref="classpath" />
   </target>

   <target name="compileFlexBasedClients"
           description="Compile the Flex clients"
           depends="compileFlexBasedHelloWorldClient,
                    compileFlexBasedComplexObjectClient" />

   <target name="compileFlexBasedHelloWorldClient"
           description="Compile Flex Hello World client application into SWF file.">
      <exec executable="mxmlc">
         <arg line="-debug=${flex.debug}" />
         <arg line="-context-root=${flex.context.root}" />
         <arg line="-services=${flex.services}" />
         <arg line="-warnings=${flex.warnings}" />
         <arg line="-publisher=${flex.publisher}" />
         <arg line="-title=${flex.title}" />
         <arg line="-description=${flex.description}" />
         <arg line="-verbose-stacktraces=${flex.verbose.stacktraces}" />
         <arg line="-show-actionscript-warnings=${flex.actionscript.warnings}" />
         <arg line="-output ${dist.dir}/${flex.app.helloworld.name.swf}" />
         <arg line="-- ${flex.app.helloworld.name.source}" />
      </exec>
   </target>

   <target name="compileFlexBasedComplexObjectClient"
           description="Compile Flex Complex Object client application into SWF file.">
      <exec executable="mxmlc">
         <arg line="-debug=${flex.debug}" />
         <arg line="-context-root=${flex.context.root}" />
         <arg line="-services=${flex.services}" />
         <arg line="-warnings=${flex.warnings}" />
         <arg line="-publisher=${flex.publisher}" />
         <arg line="-title=${flex.title}" />
         <arg line="-description=${flex.description}" />
         <arg line="-verbose-stacktraces=${flex.verbose.stacktraces}" />
         <arg line="-show-actionscript-warnings=${flex.actionscript.warnings}" />
         <arg line="-output ${dist.dir}/${flex.app.complexobject.name.swf}" />
         <arg line="-- ${flex.app.complexobject.name.source}" />
      </exec>
   </target>

   <target name="war"
           description="Build server's web application archive (WAR)."
           depends="-init,
                    -copy-respective-services-config-files,
                    compileJavaBasedServer">
      <war webxml="${web.inf.dir}/web.xml"
           destfile="${dist.dir}/${serverside.war}"
           filesonly="true">
         <zipfileset dir="${web.inf.dir}"
                     excludes="web.xml
                               flex/${services.config.client.name}"
                     prefix="WEB-INF" />
      </war>
   </target>

   <target name="all" depends="war, compileFlexBasedClients"
           description="Build it all; the default target." />

   <target name="clean" description="Remove generated files."
           depends="-clean-generated-blazeds-config-files">
      <delete dir="${dist.dir}" />
      <delete dir="${classes.dir}/dustin" />
   </target>

   <target name="-clean-generated-blazeds-config-files">
      <delete file="${app.flex.dir}/${services.config.server.name}"
              quiet="true" />
      <delete file="${app.flex.dir}/${services.config.client.name}"
              quiet="true"/>
   </target>

   <target name="javadoc" description="Generate Javadoc-based documentation">
      <javadoc doctitle="Dustin's Spring BlazeDS Integration Example"
               destdir="${javadoc.dir}"
               sourcepath="${src.dir}"
               classpathref="classpath"
               private="true"
               author="Dustin" />
   </target>

</project>
In the above
build.xml file, there are three properties defined near the top that would most likely need to be changed for a different deployment environment. They are client.host, client.port, and app.dir. The first two are used to appropriately build the client's version of services-config.xml to reference the host and port on which the server BlazeDS-powered application will be running. Because I am using GlassFish defaults for my server, I define these properties respectively to localhost and 8080. The third property, app.dir defines the directory into which I expanded the contents of the blazeds.war file for editing.Targets of specific interest in the above
build.xml file include the compileFlexBasedHelloWorldClient target for building the Flex client with the mxmlc compiler and the war target for building the WAR file to be deployed on the server.When I build the WAR and the client SWF file (same name as its source MXML file but with an .swf extension rather than the .mxml extension), I can then deploy the WAR and run the SWF client. The deployment of the WAR file is done with whatever mechanism your web serve provides. The SWF client can easily be executed by clicking on it or typing its full name on the command line. The following two screen snapshots show the client running by first showing how it initially appears and then showing how it appears once a name has been entered into the name field.


Binding Java to ActionScript
The above example demonstrates the ability to remotely call Java on the server from MXML on the client via the RemoteObject and BlazeDS. However, the example up to this point has only used simple mappings (in this case Strings). It is more interesting to now move onto an example of binding a more complex objects. The good news is that it is all still pretty easy.
For this slightly more complex example, we will expand the
HelloWorldRemotingServer class to feature a method that accepts a domain object that is neither a primitive, a boxed version of a primitive, or a String. The revised version of HelloWorldRemotingServer is shown next:HelloWorldRemotingServer.java (Finished Version)
package dustin;

/**
 * Simple "Hello World" example meant for use in BlazeDS remoting example.
 * This is the server-side POJO that will be exposed to a Flex client via
 * BlazeDS remoting.
 *
 * @author Dustin
 */
public class HelloWorldRemotingServer
{
   /** No-arguments constructor. */
   public HelloWorldRemotingServer() {}

   /**
    * Accept a String representing a name and return that name as part of a
    * Hello message.
    *
    * @param nameToSayHelloTo Name to which Hello will be addressed.
    * @return Hello address to provided name.
    */
   public String processHello(final String nameToSayHelloTo)
   {
      return "Hello, " + nameToSayHelloTo + "!";
   }

   /**
    * Accept a last name and a first name and return the concatendated name as
    * part of a James Bond like introduction.
    *
    * @param firstName Provided first name of person.
    * @param lastName Provided last name of person.
    * @return The James Bond like introductory message.
    */
   public String processName(final String firstName, final String lastName)
   {
      return "Your name is " + lastName + ". " + firstName + " " + lastName + ".";
   }

   /**
    * Accept a Person and return that person's name as part of a James Bond like
    * introduction.
    *
    * @param person Person whose name will be returned.
    * @return The James Bond like introductory message.
    */
   public String processName(final Person person)
   {
      return  "Your name is " + person.getLastName() + ". "
             + person.getFirstName() + " " + person.getLastName() + "!";
   }
}
One of the newly added methods is called
processName(String,String). This wouldn't make a very exciting example because it still uses two separate Strings. The more interesting example will be binding a Flex client to the processName(Person) method that expects a Person instance. For our newly updated class to compile, we need to define a Person class in the same package. That is shown next:Person.java
package dustin;

/**
 * Encapsulates a person's information.
 *
 * @author Dustin
 */
public class Person
{
   /** Last name of person. */
   private String lastName;

   /** First name of person. */
   private String firstName;

   /** No-arguments constructor. */
   public Person() {}

   /**
    * Constructor accepting names for this person.
    *
    * @param newLastName Last name of the person.
    * @param newFirstName First name of the person.
    */
   public Person(final String newLastName,
                 final String newFirstName,
                 final int newAge)
   {
      this.lastName = newLastName;
      this.firstName = newFirstName;
   }

   /**
    * Provide person's first name.
    *
    * @return Person's first name.
    */
   public String getFirstName()
   {
      return this.firstName;
   }

   /**
    * Set/change the person's first name.
    *
    * @param newFirstName New first name for the person.
    */
   public void setFirstName(final String newFirstName)
   {
      this.firstName = newFirstName;
   }

   /**
    * Provide person's last name.
    *
    * @return Person's last name.
    */
   public String getLastName()
   {
      return this.lastName;
   }

   /**
    * Set/change person's last name.
    *
    * @param newLastName New last name for person.
    */
   public void setLastName(final String newLastName)
   {
      this.lastName = newLastName;
   }

   /**
    * String representation of me.
    *
    * @return My String representation.
    */
   @Override
   public String toString()
   {
      return this.firstName + " " + this.lastName;
   }
}
There is nothing remarkable about the
Person class and there is no sign of any association with ActionScript or Flex in this Java class. In fact, the Person class is downright boring.For Strings, primitives, and object/boxed versions of primitives, BlazeDS can typically map these types to appropriate ActionScript types. Now that we've introduced the
Person type, however, we need to instruct BlazeDS how to use this Java class on the Flex-based client side. This is easily done by simply creating a parallel Person class in ActionScript that explicitly associates itself with the Java version of Person. The code for the ActionScript version of Person is shown next.Person.as
package dustin
{
   [Bindable]
   [RemoteClass(alias="dustin.Person")]
   public class Person
   {
      /** First name of person. */
      private var _firstName:String;

      /** Last name of person. */
      private var _lastName:String;

      /**
       * Constructor accepting names of this newly instantiated person.
       * Because each parameter has a default of null, this can be used as a
       * no-arguments constructor.
       *
       * @param newFirstName First name to be used for this person.
       * @param newLastName Last name to be used for this person.
       */
      public function Person(
         newFirstName:String = null,
         newLastName:String = null)
      {
         _firstName = newFirstName;
         _lastName = newLastName;
      }

      /**
       * WRITE (set/change) firstName property.
       *
       * @param newFirstName New first name.
       */
      public function set firstName(newFirstName:String):void
      {
         _firstName = newFirstName;
      }

      /**
       * READ firstName property.
       *
       * @return My first name.
       */
      public function get firstName():String
      {
         return _firstName;
      }

      /**
       * WRITE (set/change) lastName property.
       *
       * @param newLastName new last name.
       */
      public function set lastName(newLastName:String):void
      {
         _lastName = newLastName;
      }

      /**
       * READ lastName property.
       *
       * @return My last name.
       */
      public function get lastName():String
      {
         return _lastName;
      }
   }
}
Arguably the most interesting point about the ActionScript version of
Person is the use of RemoteClass metadata tag ([RemoteClass(alias="dustin.Person")]) to explicitly associate this ActionScript class with the Java class. By naming the property write/set and read/get methods to match those in the Java class, the remaining binding of ActionScript object to Java object is handled by BlazeDS.The ActionScript
Person.as file should be placed in a newly created subdirectory named dustin (for the "dustin" package) parallel to the WEB-INF directory. We now need to move onto building a new Flex client to use this new method on the server-side.I want to make one final observation regarding the
Person class in ActionScript. The code would have been even more concise if I had made the data members public. In that case, they could be accessed directly and the set and get methods would not be necessary. Many of the online examples take this approach.A New Flex Client (Complex Object Client)
The code for
ComplexObjectRemotingClient.mxml is shown next. It should be placed in the same location as our previous Flex client (in expanded directory and parallel to the WEB-INF subdirectory).ComplexObjectRemotingClient.mxml
<?xml version="1.0" encoding="UTF-8" ?>
<mx:Application xmlns:mx="http://www.adobe.com/2006/mxml"
                width="1100" height="700">

   <mx:Script>
   import dustin.Person;

   /**
    * Prepare provided name information and send to server.
    *
    * @param firstName First name of person.
    * @param lastName Last name of person.
    */
   public function processAndSubmitName(firstName:String, lastName:String):void
   {
      const person:Person = new Person(firstName, lastName);
      remoteObject.processName(person);
   }
   </mx:Script>

   <!-- Associate client with BlazeDS destination via RemoteObject. -->
   <mx:RemoteObject id="remoteObject" destination="HelloWorld" />

   <mx:Panel id="mainPanel" title="BlazeDS Remoting Example - Complex Object Mapping">
      <mx:Form>
         <mx:FormItem label="Your First Name">
            <mx:TextInput id="firstNameInput" />
         </mx:FormItem>
         <mx:FormItem label="Your Last Name">
            <mx:TextInput id="lastNameInput" />
         </mx:FormItem>
         <mx:FormItem>
            <mx:Button label="Submit Name!"
                       click="processAndSubmitName(firstNameInput.text, lastNameInput.text);" />
         </mx:FormItem>
         <mx:FormItem label="Server's Response">
            <mx:Label text="{remoteObject.processName.lastResult}" />
         </mx:FormItem>
      </mx:Form>
   </mx:Panel>
</mx:Application>
The new Flex client uses a little ActionScript to prepare the call to the server and instantiates one of our newly written
Person objects in the process. The build.xml file shown previously already included the target for building this new client ("compileFlexBasedComplexObjectClient"). Note that the Java code also needs to be rebuilt and the WAR reassembled and redeployed to the web server because of the addition of methods to the server class.The following two screen snapshots show the initial and final state of the new client when it is executed as the Hello World client was earlier.


As the above output shows, the method accepting a Person object (note the exclamation point in the returned message) has been contacted on the Java side from a remote Flex client.
Pictorial Overview of Directory/File Structure
One of the things that can be a little tricky about using BlazeDS or the mxmlc compiler if you have very little experience using them is the placement of files. Fortunately, most of this was already setup correctly by the
blazeds.war file that we expanded. However, I did add some directories and files. In an effort to make it more clear where these directories and files are in relation to one another, I include the next screen snapshot of my final directory structure. I tried in the text above to describe where within these various directories each file should go.
The image above shows where to place MXML source files, ActionScript source files, and Java source files for the
build.xml file described above to work properly. I did not provide descriptions of the nbproject subdirectory (used for NetBeans specifically), the images subdirectory (used to store the screen snapshots shown in this blog posting), or the WEB-INF subdirectory (it was provided by the expanding of blazeds.war). The only thing to note here is that I added the Java source code files (but not ActionScript source code files) into the src directory under WEB-INF.Conclusion
This has turned out to be a rather lengthy blog entry. However, this is to be expected considering that I've intentionally tried to make this a complete and thorough introduction to BlazeDS/Java remoting and because I have included the code directly within the blog posting rather than as a separate attachment. Also, I've tried to avoid use of anything specific to FlexBuilder so that anyone with any text editor should be able to use my examples.
Despite the length of this blog entry, use of the BlazeDS remoting is pretty straightforward once you have tried it a couple times. It does get more complex when security constraints and other details are added back in, but one can choose how much one implements at each step and the examples above are nice for confirming that client-to-server communication is working properly.
Additional Resources
Subscribe to:
Posts (Atom)